
Whether you’re a DIY crafter in Nashville, a small business owner in Chicago looking to brand your staff uniforms, or a school booster club in Texas that needs 200 patches for letterman jackets, iron on patches are one of the most practical, affordable, and visually powerful customization tools available in the USA today.
But here’s the thing: not all iron on patches are created equal, and “just slapping one on with a hot iron” is one of the fastest ways to end up with a peeling, faded, or ruined garment.
This definitive Iron On Patches Guide for 2026 covers everything from the science behind heat-activated adhesive to the best fabrics, application steps, care instructions, and how to order custom iron on patches in bulk or small quantities anywhere in the United States.
What Are Iron On Patches?
An iron on patch is a decorative or branded emblem embroidered, woven, printed, or chenille that has a heat-activated thermoplastic adhesive coating on its back. When heat and pressure are applied using a household iron or heat press machine, this adhesive melts and bonds the patch permanently to the fabric beneath it.
Iron on patches are used for:
- Uniform and workwear branding (logos, name tags, department IDs)
- Fashion and streetwear customization (jackets, jeans, hats, bags)
- Sports teams and school clubs (letterman jackets, jerseys, caps)
- Repair and upcycling (covering holes, refreshing worn garments)
- Military and tactical gear (morale patches, rank insignia)
- Event merchandise (festivals, marathons, conventions)
The global custom patch market continues to expand in 2026, with iron on remaining the most popular backing type among American consumers due to its convenience and professional finish.
Types of Iron On Patches: Which One Do You Need?
Not every iron on patch looks or functions the same way. Here’s a breakdown of every type available in 2026 and which use cases each serves best.
1. Iron On Embroidered Patches
The gold standard. Custom Embroidered Patches feature thread stitched over a woven base fabric, creating a textured, premium look. They’re the most popular choice for uniforms, jackets, and brand merchandise across the USA.
Best for: Corporate uniforms, military gear, team jackets, brand logos
2.Iron On Woven Patches
Custom Woven Patches are created on a loom, producing ultra-fine detail at lower thread counts. The design is part of the fabric itself rather than stitched on top, ideal when your logo has thin text, small elements, or photo-level complexity.
Best for: Text-heavy designs, detailed illustrations, soft garments
3. Iron On Chenille Patches
Custom Chenille Patches have a signature fuzzy, varsity-letter texture that screams American tradition. You’ll find them on letterman jackets, cheerleading uniforms, and college merch across the country.
Best for: Schools, universities, sports teams, retro fashion
4. Iron On PVC Patches
Custom PVC Patches are molded rubber emblems waterproof, flexible, and extremely durable. When made with an iron on backing, they’re popular for tactical gear, outdoor equipment, and premium streetwear.
Best for: Military, outdoor/tactical, wet-condition applications
5. Iron On 3D Embroidery Patches
These take embroidered patches a step further with raised foam layers underneath the top thread, creating a bold, sculptural 3D effect. Custom 3D Embroidery Patches are a big trend in American streetwear and custom headwear in 2026.
Best for: Hats, caps, premium apparel, brand drops
6. Iron On Silicone Patches
Custom Silicone Patches offer a sleek, modern, soft-touch finish. They’re heat-resistant and water-resistant, making them a rising choice for activewear and performance apparel.
Best for: Athleisure, sportswear, waterproof jackets
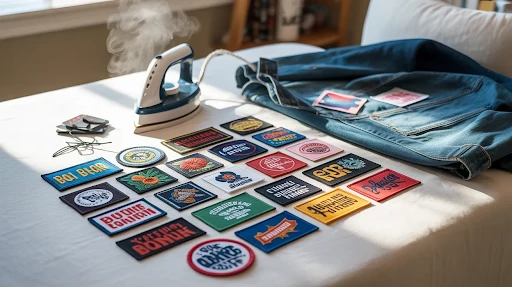
How Iron On Patches Work
Alt text: Attaching an iron on patch with an iron.
Understanding why iron on patches bond to fabric helps you apply them correctly and avoid the most common failure points.
The backing on an iron on patch is a thermoplastic adhesive (typically polyamide or polyester-based). At room temperature, this adhesive is solid and non-sticky. When heat reaches approximately 300°F–320°F (149°C–160°C) and is held with firm downward pressure, the adhesive melts and penetrates the fibers of the fabric. As it cools, it re-solidifies, locking the patch in place at a molecular level.
Three critical factors determine bond strength:
- Temperature: Too low and the glue won’t activate; too high and it scorches the fabric
- Pressure: Light touching won’t work; you need a firm, even downward force
- Time: The standard window is 10–15 seconds per application; some thick patches need 20 seconds
This is also why certain fabrics fail: nylon, polyester blends, and synthetic fabrics don’t absorb adhesive well because their fibers are non-porous at the micro level.
How to Apply Iron On Patches: Step-by-Step Guide (2026)
What you’ll need:
Iron or heat press, pressing cloth/parchment paper, a flat surface, your iron on patch
Step 1: Preheat your iron
Set your iron to the cotton or high heat setting, approximately 300°F–320°F. Do NOT use steam. Steam introduces moisture that interferes with adhesive bonding. If you have a heat press machine, set it to 320°F with medium-to-high pressure.
Step 2: Pre-press the garment
Place the garment on a hard, flat surface (an ironing board is fine, but a table with a folded towel works too). Iron the area where the patch will go for 5–10 seconds to remove moisture and wrinkles. A perfectly flat, dry surface gives the best bond.
Step 3: Position the patch
Place the patch adhesive-side-down in the exact position you want. If you’re doing multiple patches or need precise alignment, use a small piece of heat-resistant tape to hold it temporarily.
Step 4: Cover with a pressing cloth
Place a thin cotton cloth or parchment paper over the patch. This protects the patch surface from direct iron contact, which can scorch embroidery thread or flatten the texture.
Step 5: Apply firm pressure and heat
Press the iron firmly down onto the cloth-covered patch. Apply steady downward pressure for 10–15 seconds. Do not move the iron in a gliding motion, hold it still. Work in sections if the patch is larger than your iron plate.
Step 6: Flip and press from the inside
Turn the garment inside out and repeat the pressing process for 10–15 seconds from the reverse side. This activates the adhesive that may not have fully bonded from the front, significantly improving long-term durability.
Step 7: Cool completely before handling
Allow the patch to cool for 60–90 seconds before touching it. Moving or pulling the garment while the adhesive is still warm can shift the patch or weaken the bond.
Step 8: Test the edges
Gently try to lift the patch edges. If any corner lifts, re-press that specific area with extra pressure. If you want guaranteed permanent adhesion, especially for items that will be washed frequently, add a few stitches around the perimeter.
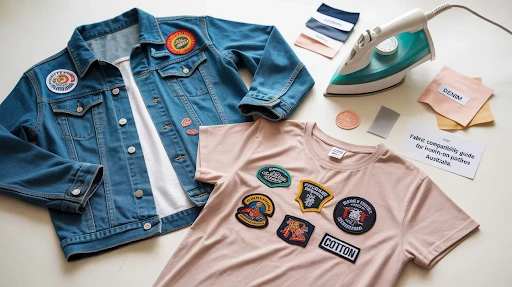
Fabric Compatibility Guide for Iron On Patches
This is one of the most-searched topics related to iron on patches and one where a lot of Americans run into trouble. Here’s the definitive fabric compatibility chart for 2026:
| Fabric | Compatible? | Notes |
| 100% Cotton | Excellent | Best results: high heat tolerance |
| Denim | Excellent | Ideal for jeans and jackets |
| Canvas | Excellent | Great for bags, tote bags |
| Wool | Good | Use medium heat; protect with a cloth |
| Polyester (100%) | Moderate | Low heat only; sew-on preferred |
| Poly-Cotton Blend | Moderate | Test a small area first |
| Nylon | Not Recommended | Melts at iron-on temperatures |
| Leather / Faux Leather | Not Recommended | Use sew-on or adhesive backing |
| Rayon / Silk | Not Recommended | Too delicate; iron will damage fabric |
| Waterproof/Gore-Tex | Not Recommended | Lamination prevents adhesion |
Pro tip for Americans with performance gear: If you need patches on nylon tactical vests, athletic jackets, or moisture-wicking uniforms, our Custom Sew On Patches are built exactly for that use case.
| Pro tip for Americans with performance gear: If you need patches on nylon tactical vests, athletic jackets, or moisture-wicking uniforms, our Custom Sew On Patches are built exactly for that use case. |
How to Remove Iron-On Patches
Iron-on patches are designed to stay attached firmly, but they can still be removed safely with the right method. The process mainly involves softening the adhesive with heat and carefully peeling the patch away without damaging the fabric.
Things You Will Need
- Iron or hair dryer
- Thin cotton cloth or towel
- Tweezers or a butter knife
- Rubbing alcohol or adhesive remover
- Soft cloth or cotton balls
- Laundry detergent
Method 1 — Remove Iron-On Patches Using an Iron
Heat the Patch
Set your iron to a medium or high setting depending on the fabric type.
- Denim and cotton can handle higher heat.
- Polyester and delicate fabrics need lower heat.
Place a thin cloth over the patch to protect the garment. Press the iron on the patch for about 15–30 seconds so the adhesive underneath softens.
Peel the Patch Slowly
Lift one corner carefully using tweezers or a dull butter knife.
- Pull gently and slowly.
- If the patch feels stuck, apply more heat.
- Avoid forcing it because this can tear the fabric.
Continue heating and peeling until the patch comes off completely.
Remove Adhesive Residue
After removing the patch, leftover glue may remain on the fabric.
Apply:
- Rubbing alcohol
- Adhesive remover
- White vinegar
Rub gently with a soft cloth until the sticky residue disappears.
Wash the Garment
Wash the clothing normally to remove any remaining glue, odor, or cleaning solution from the fabric.
Method 2 — Remove Iron-On Patches Using a Hair Dryer
Apply Heat
Turn the hair dryer to high heat and point it directly at the patch for 1–2 minutes.
Lift the Edges
Once the glue softens, slowly peel the patch from one corner.
Repeat the heating process if the adhesive hardens again during removal.
Method 3 — Freezer Method for Old Patches
Freeze the Garment
Place the clothing inside a plastic bag and leave it in the freezer for several hours.
Scrape the Patch
Once frozen, use a dull knife or scraper to lift the patch carefully. The brittle adhesive may crack and release more easily.
How to Remove Leftover Glue
Use Rubbing Alcohol
Rubbing alcohol works well on denim, cotton, and canvas fabrics.
Try White Vinegar
White vinegar naturally softens mild adhesive residue without harsh chemicals.
Use Adhesive Remover
Commercial adhesive removers are effective for stubborn glue, but always test them on a hidden area first.
Important Precautions
Avoid Excessive Heat
Too much heat can:
- Burn fabric
- Melt synthetic materials
- Leave shiny marks
Test on a Hidden Area
Always test heat and cleaning solutions on an inside seam or hidden section first.
Do Not Use Sharp Blades
Sharp tools can damage fabric fibers or create holes in the garment.
Work Slowly
Pulling the patch too quickly may stretch or tear the material.
Can Iron-On Patches Be Reused?
Most iron-on patches lose their adhesive strength after removal. If you want to reuse the patch, you can:
- Sew it onto another garment
- Apply new iron-on adhesive backing
- Use fabric glue for reattachment
Best Fabrics for Patch Removal
Iron-on patches are easiest to remove from:
- Denim
- Cotton
- Canvas
- Heavy jackets
Delicate materials like silk, nylon, and polyester require extra care and lower heat settings.
Iron On vs Sew On Patches: Which Is Right for You?
Here is the quick 2026 decision framework on Sew On vs Iron On Embroidered Patches: Which Holds Better?
Choose Iron On if:
- You’re applying to cotton, denim, or canvas
- You want a quick, tool-free application
- The item won’t be washed more than 30–40 times
- You’re doing a personal project or one-time customization
Choose Sew On if:
- The fabric is synthetic, nylon, or heat-sensitive
- The item will be washed frequently (uniforms, workwear)
- You need maximum permanent adhesion
- You’re working with heavy-duty outerwear or tactical gear
Best of both worlds: Many professional decorators use the iron on + edge stitch method apply with heat first to position perfectly, then sewing around the border. This gives you precision placement AND industrial-strength durability.
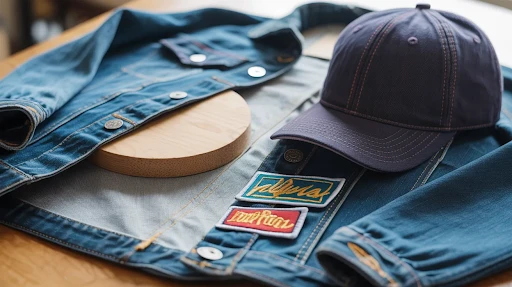
Best Uses for Iron On Patches in the USA in 2026
Iron on patches aren’t just a craft store staple, they’re a serious branding and customization tool used by American businesses, teams, and creators across every industry. Here’s what’s trending in 2026:
Workwear & Corporate Branding
From HVAC companies in Phoenix to landscaping crews in Atlanta, iron on patches on work shirts and jackets offer a clean, professional look without the cost of full embroidery on every garment. Order in bulk with your company logo and apply to any uniform fast and cost-effectively.
School Sports & Varsity Programs
American high schools and universities are sticking with tradition: chenille and embroidered iron on patches for letterman jackets, spirit wear, and team jerseys remain a staple from coast to coast. Our Custom Chenille Patches are a fan favorite for exactly this.
Small Business Merchandise
Etsy sellers, streetwear brands, and independent artists across the USA are using custom iron on patches to create branded merch without large upfront inventory. With a minimum order of just 10 pieces at The Custom Patches USA, it’s accessible for any scale.
Military & Veteran Communities
Morale patches, unit insignia, and commemorative emblems are a proud American tradition. Our Custom Iron On Patches are made to the durability standards required by military and veteran groups nationwide.
DIY Fashion & Thrifting Culture
The thrift-flip and sustainable fashion movement is massive in 2026. Iron on patches let Americans breathe new life into secondhand finds from vintage denim jackets to band tees.
Events, Festivals & Clubs
From Burning Man camps to local biker clubs to 5K race organizations in the Midwest, event-specific iron on patches serve as wearable memories that attendees keep for years.
How to Order Custom Iron On Patches in the USA
Ordering custom iron on patches in 2026 is easier than ever, but knowing what to look for in a supplier makes a big difference in quality and turnaround.
Step 1: Choose Your Patch Type
Decide between embroidered, woven, PVC, chenille, or silicone based on your design complexity, intended use, and fabric. (See the types section above for guidance.)
Step 2: Prepare Your Artwork
A high-resolution vector file (AI, EPS, PDF) or a clear PNG at 300 DPI gives the best digitizing results. Don’t have a logo file ready? The Custom Patches USA offers free design services, our team will digitize and refine your artwork at no extra cost.
Step 3: Choose Size, Shape & Border Style
Common sizes range from 2″ to 5″ for standard use. Shape can be die-cut to your exact design or standard (round, rectangle, shield). For border style options, a merrowed edge vs a laser cut border can be the best option.
Step 4: Set Your Quantity
Our minimum order is just 10 pieces, perfect for small teams or personal projects. Bulk pricing kicks in at higher quantities, making large orders (100, 500, 1000+ pieces) very cost-effective. See our pricing Page for current rates.
Step 5: Request a Free Quote
Submit your design, quantity, and specs through our contact page. We’ll send a digital proof before production, no surprises.
What Sets The Custom Patches USA Apart
- 100% Quality Guarantee
- Free shipping on all USA orders
- Free design and digitizing service
- Low 10-piece minimum
- Fast turnaround rush options available
- 1,000+ verified 5-star reviews (Google & Trustpilot)
Proper laundering keeps iron on patches looking sharp and bonded long-term. Follow these care rules:
- Wait 24 hours
After application, before the first wash, allows the adhesive to fully cure
- Wash inside-out
on a cold or warm cycle (never hot water)
- Avoid high-heat dryer settings
air dry or use low heat
- Skip dry cleaning solvents
They can break down the thermoplastic adhesive
- Re-press periodically
If an edge begins to lift after many washes, 10 seconds with an iron and pressing cloth reactivates the adhesive
- Spot clean
When possible, reduce wash frequency
For patches on items that need industrial washing (restaurant uniforms, hospital scrubs, etc.), we always recommend adding a sew-around stitch as well.
Common Mistakes Americans Make with Iron On Patches (And How to Avoid Them)
Mistake #1: Using steam
Steam and moisture prevent the adhesive from bonding. Always use a dry iron.
Mistake #2: Applying to synthetic fabric with high heat
Polyester and nylon can scorch or melt. Either use low heat or switch to sew-on backing.
Mistake #3: Not pressing from both sides
Front-only pressing leaves the adhesive partially un-bonded. Always flip and press from inside the garment.
Mistake #4: Pressing on an unstable surface
A soft or uneven surface absorbs pressure instead of transferring it to the fabric. Use a hard, flat base.
Mistake #5: Moving the garment before the adhesive cools
This shifts patch placement and creates weak spots. Always wait 60–90 seconds.
Mistake #6: Ordering from unverified overseas suppliers
Cheap patches with thin adhesive coatings peel after the first wash. Always order from a verified USA-trusted supplier with quality guarantees like The Custom Patches USA.
Mistake #7: Skipping the edge-stitch on high-use items
If the item will be washed frequently or is a uniform, iron on alone is never enough. Add stitching for permanent results.
Frequently Asked Questions About Iron On Patches (2026)
Do iron on patches stay on permanently?
Iron on patches can last permanently on compatible fabrics (cotton, denim, canvas) when applied correctly with proper heat and pressure. However, repeated machine washing, high heat drying, and synthetic fabrics can weaken the bond over time. For permanent results on any fabric, finish with a sew-around stitch after ironing.
What temperature do iron on patches need?
The ideal application temperature is 300°F to 320°F (149°C–160°C), which corresponds to the cotton or high setting on most household irons. Never use steam. For heat press machines, set to 320°F with medium-to-high pressure for 10–15 seconds.
Can I iron on patches to polyester?
Yes, but with caution. Use the lowest effective heat setting and a thick pressing cloth to prevent scorching. Polyester’s synthetic fibers don’t bond as well as natural fibers, so results may be less permanent. For polyester uniforms or athletic wear, sew on backing is a more reliable option.
How long does it take to apply an iron on patch?
The actual pressing process takes 30–60 seconds total (10–15 seconds per side). Including prep and cool-down time, the full process takes about 5 minutes per patch.
Can I remove an iron on patch?
Yes. Applying high heat with an iron over the patch will soften the adhesive enough to peel it back carefully. A cloth dampened with rubbing alcohol can help remove adhesive residue. Note that this process may leave faint adhesive staining on delicate fabrics.
How many washes do iron on patches last?
On compatible fabrics with a correct application, quality iron on patches (like those from The Custom Patches USA) can withstand 30–50+ wash cycles before showing any edge lifting. Adding a perimeter stitch extends this to the life of the garment.
What’s the minimum order quantity for custom iron on patches?
At The Custom Patches USA, the minimum order is just 10 pieces, making it accessible for individuals, small businesses, and clubs of any size. Bulk pricing is available for orders of 100+ pieces.
How long does it take to receive custom iron on patches in the USA?
Standard production takes 10–14 business days after artwork approval, with free shipping included to anywhere in the United States. Rush orders are available.
What’s the difference between iron on embroidered patches and woven patches?
Embroidered patches have thread stitched on top of a twill base, giving them a textured, raised look, great for bold logos. Woven patches are created on a loom where the design is part of the fabric itself, better suited for intricate designs with fine text or photo-like detail. Both are available with iron on backing.
Can I use a hair straightener instead of an iron to apply patches?
Yes, a hair straightener can work as a substitute, especially for small patches or hard-to-reach areas on garments. Use the highest heat setting, press firmly, and hold for 15–20 seconds. It won’t cover large patches as effectively as a flat iron or heat press, so work in small sections.
Iron On Patches Are a Smart Investment in 2026
Whether you’re outfitting a team, building a brand, or personalizing your wardrobe, iron on patches remain one of the most cost-effective and high-impact customization tools available to Americans in 2026. The key is pairing a quality patch (the right type, the right backing) with a correct application and knowing when to reinforce with a stitch.
At The Custom Patches USA, we’ve delivered over 1,000+ verified 5-star orders for American businesses, schools, military units, and creators across every state. From a single custom design to bulk orders of 10,000 patches, we deliver quality, on time, with free shipping and free design help.